Showing posts with label holiday. Show all posts

Sunday, February 12, 2012

DIY Valentine's Day Felt Garland

You didn't think I'd go past a holiday without doing a little bit of decorating for it did you?  Of course not. Since I didn't have any good ideas in my database, I started by browsing pinterest for some ideas, and found a couple of cute ones!

I wish I knew exactly where these directions came from, but once I hit this chinese website, that was as far as I could trace the source.


Since the picture above was the extent of the directions I had to do some guessing as far as the size of my felt.  I ended up using 4" tall felt and that made really nice shaped hearts, but you could go taller or shorter depending on your heart shape preferences.

This is how I threaded 3-4 on string at a time.  Doing this made the garland assembly move much quicker.

Spread out garland.


I used red, pink, and white felt here, but it's hard to see the difference between the pink and red.

To take the place of my twisted felt garland from christmas, I strung some of the hearts vertically instead of horizontally as above.

And finally hung one last strand over the living room entry way.

I've still got one or two more Valentine's day crafts to show, so stop back soon!

Saturday, December 24, 2011

Model Magic Ornaments

Another fun ornament craft I found was making model magic ornaments.  I haven't used model magic much if ever before, but it did end up making fun ornaments.


 I got one package of white model magic, but other christmas or holiday colors would be great too.  I rolled it out on my cutting mat and used some christmas cookie cutters to cut out shapes.  To have a place to hang them from, I used the end of a straw to make little holes in the top that I could pass twine or ribbons through.

Requisite cat crafting photo.

The drying time for model magic is a bit long at 24-48 hours, and I had to sit them up high so that curious kitties couldn't leave model magic footprints behind.


After a day I flipped them over to let the other side dry.  The only bad part about this project was when I let the finished ornaments sit on my sideboard for a few days, and then we bought a humidifier.  When I went to pick up the ornaments, they had absorbed enough moisture out of the air to cause them to stick to the table.  It ended up ruining two of the ornaments, and it was a pain in the rear to get off the table.

Since I made a few snowmen, I used some acrylic paint to give them some faces, buttons, and scarves.  I also did a little paint doodle on another ornament just to add some color.  The model magic blends pretty well according to the package directions, so I think it could be neat to do some color blending and have a striped or marble effect dried into the ornaments.


Friday, December 23, 2011

Twisted Felt Garland

The glitter ornaments were hands down my favorite christmas addition this year, and these twisted felt garlands were easily my second favorite, in part because they were so darn easy and quick.

I found the twisted felt tutorial on the Purl Bee and I knew it would be a great project.  There are also way more detailed directions over there, so check it out if you're interested in making these!

Step one is always to let the cat sit on the new project.  Or rather that's what she thinks step one is.  I got 1/2 of a yard of felt in red, green, and white and was able to make a ton of garland.  If you don't want quite so much, I'd recommend 1/8 or 1/4 of a yard.  I also got the really wide felt that's 72".


I folded the felt and squared off the edge, and then refolded it so that it was about a foot tall and cut off one inch strips.  For me that meant I was cutting through eight layers of felt with the rotary cutter.  My edges weren't totally straight or a consistent width, but I was going for quick and easy.  You could easily do this with just a pair of scissors though the rotary cutter made cutting much quicker.

After I had my strips cut out, I lined up two colors and cut 2" vertical lines in the felt.  I spaced them about 1" apart.  Only do 3-5 cuts at a time though.  I flipped the felt through the cuts to get the twist, and it doesn't matter which way it's flipped as along as you do it the same way the whole length of the garland.  Or don't if that's the look you want.

One finished garland.

I made a bunch in red/white, green/white, and red/green. The best part about this is you could pick any colors you wanted to make it work for different holidays.  I'll probably pull out the red/white felt for valentines day and the green/white could be used for saint patrick's day...if that's something you decorate the house for.  Who knows maybe I'll make more after christmas that's just everyday fun colors like pink and purple for the craft room.

To make longer garland, I used a zigzag stitch to sew the edges together.  I used little command hooks to hang these all over the apartment; I love command hooks.  I bought 3 or 4 packages to hang lights and garland and have used them all over.

Our bedroom door.

Laundry room door.  After Steve got home, I had to readjust the height of the hanging downie bit because Steve didn't want to keep running into it.

In place of the halloween decorations, I put up christmas garland.

And again on the stairway half wall.

Monday, November 28, 2011

Thanksgiving

We had a lovely Thanksgiving this year!  Much different than our celebration last year, we spent this year with our family.

I got to make a few appetizers to bring to the party so I chose potato skins, spinach artichoke dip and bruschetta.
The potato skins are another Simply Recipes favorite of mine.

Spinach Artichoke dip made in the crockpot is super simple.  Tip: buy bulk spinach instead of boxed spinach, it's about half the price! 

A nice simple bruschetta via Tasty Kitchen!

The appetizer table.


One carved turkey

Lots of bread and delicious homemade strawberry jelly!

Side dishes galore made by my mom and grandmother

Stuffing straight from the bird!

Brussels sprouts for dinner too, these are fantastic!

Poking around having some fun.


Sitting around watching football and chatting!


There were also lots of pretty decorations up. 

Beautiful chandelier.

Tasty tasty fruit (not really, it's fake)

There were lots of great desserts, but somehow I forgot to take pictures of the desserts; we were probably too busy eating them up!

Wednesday, November 2, 2011

Cute Easy Halloween Decor

I’m not much of an autumn lover and that’s especially true this year because I’m constantly freezing!  I did manage to get a few Halloween decorations put up around the apartment before November showed up, although barely.

I tried to stick with a few simple ideas that wouldn’t be too hard or costly, so I made pumpkin bunting and some orange and black zig zag streamers (a la Oh Happy Day!).  I used cardstock for the streamers, and I think they might have stretched better with regular paper instead.


We also got a pumpkin from the farmer’s market, but we didn't do anything with it. I wanted to try painting it instead, kind of like these two, but it just never happened.  It might just happen yet, since it won't decompose nearly as quickly as carved pumpkins do and we don't seem to have pumpkin smashers around the neighborhood.

Sadly, we only had one trick or treater this year, and that's only because they ran into Steve as he was coming home and he told them we had candy to hand out.

Friday, July 8, 2011

Celebrating the 4th

When July started, I wasn't sure we were actually going to do anything to celebrate the 4th, but then we got a great invitation to a party hosted by some friends and decided to go.  I was in this strange place because I was actually doing homework on the 4th and getting ready for the party.  Not to mention my final exam that was the next day.  Life sure doesn't stop around here for holidays.

I ended up making two desserts for the party, my recent favorite Malted Milk Chocolate Chip Cookies and a new Coffee and White Chocolate Chip Blondies.  The cookies were a hit, as I knew they would be.  Somehow the addition of malted milk makes these like crack cookies, seriously irresistible.  Plus, they're super chewy and only bake for like 7 minutes, bonus!

The blondies were tasty, but in a very elegant, snooty coffeehouse way; so while they were good, I probably won't make them again.  They also had to bake way longer than the recipe said, and by the time the poor blondies got to the party, they weren't looking so hot.  Riding bikes everywhere does have it's disadvantages when we need to transport baked goods.

At the party we had all sorts of grilled foods, including peppers, zucchini, and onions.  One of the guys also made stuffed mushrooms, a french bread pizza, and a couple different chip dips.  Fruit kebabs and fruit salad rounded out dinner nicely, and homemade apple pies with whipped cream were a great addition to the desserts I brought.

We even had temporary tattoos!  One of the girls brought back some decorations and novelties from the US back in June lest you think 'I <3 USA' tattoos are actually available in Saudi Arabia.

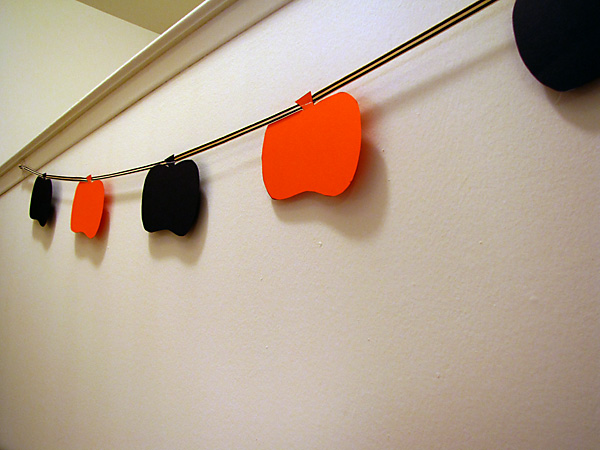
I made up some cute buntings to add to the decor.  After lammenting my lack of red paper (most of it went into Christmas decor), I realized that I had red and blue water colors so I painted some designs and cut them out into stars.

I also did regular stars from colored paper, and some star outlines from the scraps.  I really like the star outlines, and I now officially have way too much bunting hanging in our apartment.  Seven strands isn't that much, right?  Can bunting be an addiction I wonder?  It's quite possibly the easiest craft on the planet to add some festive fun.

Close up of the hand painted paper.  I really like how these turned out.

The only downside is that I had to hand trace and cut out each of the stars, but thankfully I used Martha's folding paper method to get some well proportioned patterns.

Here's the requisite super artsy photo. I love this action from the Pioneer Woman.

We also had fireworks!! I never imagined that we'd actually have them, but one of the guys drove to Jeddah and got packs of sparklers, roman candles, and flying spinners.  We also put on some great patriotic music while we were setting off the fireworks and it was a great time.  After we started setting off the roman candles, we had a couple of middle school age girls show up, and since they brought cupcakes with them, they stayed and played with the sparklers too.

All in all, it was a great night, and much different than I thought the 4th of July would be in Saudi Arabia.

On a more serious note, being in Saudi Arabia has made me appreciate how lucky we were to be born in America.  Not that I didn't appreciate the freedoms that we have before, but living without some of them for a year has made it increasingly clear just how important they are to me.

Monday, July 4, 2011

Happy 4th of July!

I hope everyone has a great day and enjoys good food, company, and loud fireworks!  We're attending a small party hosted by one of the other American students, and while we won't have any fireworks, it'll still be a blast.  I made a few decorations for the party and some tasty snacks too, so come back tomorrow for a few pictures and maybe a recipe.

Holidays here are always a strange combination of a completely normal day and a subdued celebration.  I had homework due today, although I thankfully didn't have class, and tomorrow I have a final exam to look forward to.  Life doesn't stop here unless it's a Saudi holiday, but students manage to carve out a piece of their days to celebrate their national holidays.

Monday, February 14, 2011

Why I Love Campus

I spend a decent amount of time griping about campus, so here's a little Valentine's Day antecedent about why being on campus is awesome.

Every week the cinema on campus shows two new movies.  Usually at least one is an American film, and this week they were showing Tron, which Steve has wanted to see since he found out about it.  At 5:48 pm, we checked the movie schedule online and realized the movie started in twelve minutes.  So we grabbed our new jackets (part of the amazing February Christmas miracle) and rode over to the theater.  We bought our tickets ($1.33 each), got popcorn and a drink for each of us because we hadn't eaten dinner ($2 each), and still managed to have time to go to the bathroom before the movie started.  So aside from only costing $6.67, we went from couch to stadium seating in twelve minutes.

That is exactly why I dread returning to the American commute.  My twelve minute bike and walk commute to class is just too nice.

Hope everyone had a chocolate filled holiday, and if you didn't the sales start soon!

Saturday, February 12, 2011

Valentine Craft

Have I ever mentioned that I'm terrible at admitting that I've changed my mind?  I'm not terrible at actually changing my mind, given a convincing, logical argument, but fessing up to it is not my forte.  It never has been either.  The time I spent weeks sitting in my closet reading the Harry Potter series because I didn't want to admit that it was not in fact a dumb book about wizards comes to mind.

Lo and behold, it's happened again.  Bunting has been popular to say the least in the crafting world for a while now, at least since last spring perhaps longer, and it's only now that I'm willing to admit that my first instinct when I see bunting isn't "ick."  I have no idea why I changed my mind, but the Christmas star bunting I made back in December just tickles my fancy.

So, this brings us to decorating for Valentine's Day.  I didn't decorate because I'm one of those crazy/awesome new house decor at each holiday kind of people, but because our house is drab and needed some color.  The holiday simply offered a good color theme.

I got the idea for this stained glass hearts craft from Flower Patch Farmgirl and I just knew I had to try it out.


This started with me spending some quality time with the vegetable peeler.  Apparently, a pencil sharpener might have been more practical, but these were big crayons, and I'm working with limited craft goods.  After shredding all of the crayon colors I wanted, the rest was cake.  The only trick was to make sure not to put too much crayon shavings down because I wanted the light to shine through.  It was easy enough to move the crayon goo around between the wax paper sheets while using the iron to melt them.  Sadly, this was the first time I'd used our iron and ironing board.  If they hadn't been provided we really wouldn't miss them, but at least they've earned their keep now!

I used my two hole punch (there aren't three hole punches here and all the binders either have 2 or 4 rings in them) to put holes in the cut out hearts and then threaded and taped them to some red sewing thread.

Close up of the hearts strung across our living room windows.

I made some small hearts from the scrap pieces so I taped those to the thread instead of hole punching them.

The railing overlooking the living room.  The light comes through the hearts in the middle of the day and it does a good imitation of stained glass.

The hearts finally replaced the Christmas garland in the study.  The only problem I had with the hearts was some cracking around the edges where I cut out the shapes.  I suppose you could iron the hearts again to reseal the edges, but I didn't think it was necessary.

I can't wait until next year, because I've seen some really cute crafts out there that I just don't have the supplies to do over here!  Between the new paintings and these new decorations, I think the apartment is definitely starting to look more cheery and personal.