Saturday, December 31, 2011

Our Year In Review


As we get ready to leap into the new year, I thought it would be fun to look at some highlights from 2011, because it was a lovely albeit busy twelve months.


January


February

We got Christmas presents in the mail!
I made valentine's decorations for our Saudi apartment


March

My first trip (of many) to the dentist in Jeddah!


April


May


June
Getting our flight home scheduled


July
Independence Day in Saudi Arabia


August

Celebrating small pleasures of life in the US


September

Moving into our new apartment


October


November


December


Saturday, December 24, 2011

Model Magic Ornaments

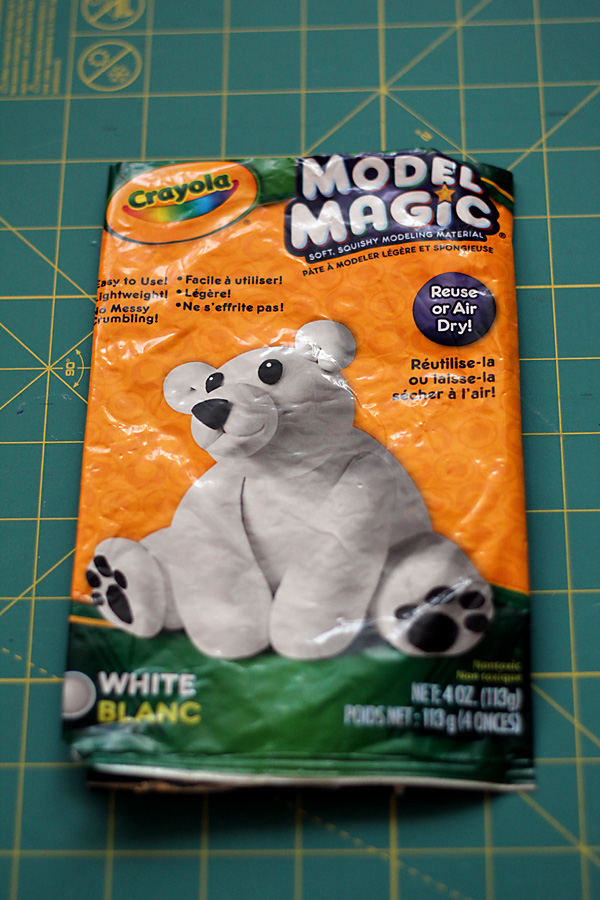
Another fun ornament craft I found was making model magic ornaments.  I haven't used model magic much if ever before, but it did end up making fun ornaments.


 I got one package of white model magic, but other christmas or holiday colors would be great too.  I rolled it out on my cutting mat and used some christmas cookie cutters to cut out shapes.  To have a place to hang them from, I used the end of a straw to make little holes in the top that I could pass twine or ribbons through.

Requisite cat crafting photo.

The drying time for model magic is a bit long at 24-48 hours, and I had to sit them up high so that curious kitties couldn't leave model magic footprints behind.


After a day I flipped them over to let the other side dry.  The only bad part about this project was when I let the finished ornaments sit on my sideboard for a few days, and then we bought a humidifier.  When I went to pick up the ornaments, they had absorbed enough moisture out of the air to cause them to stick to the table.  It ended up ruining two of the ornaments, and it was a pain in the rear to get off the table.

Since I made a few snowmen, I used some acrylic paint to give them some faces, buttons, and scarves.  I also did a little paint doodle on another ornament just to add some color.  The model magic blends pretty well according to the package directions, so I think it could be neat to do some color blending and have a striped or marble effect dried into the ornaments.


Friday, December 23, 2011

Twisted Felt Garland

The glitter ornaments were hands down my favorite christmas addition this year, and these twisted felt garlands were easily my second favorite, in part because they were so darn easy and quick.

I found the twisted felt tutorial on the Purl Bee and I knew it would be a great project.  There are also way more detailed directions over there, so check it out if you're interested in making these!

Step one is always to let the cat sit on the new project.  Or rather that's what she thinks step one is.  I got 1/2 of a yard of felt in red, green, and white and was able to make a ton of garland.  If you don't want quite so much, I'd recommend 1/8 or 1/4 of a yard.  I also got the really wide felt that's 72".


I folded the felt and squared off the edge, and then refolded it so that it was about a foot tall and cut off one inch strips.  For me that meant I was cutting through eight layers of felt with the rotary cutter.  My edges weren't totally straight or a consistent width, but I was going for quick and easy.  You could easily do this with just a pair of scissors though the rotary cutter made cutting much quicker.

After I had my strips cut out, I lined up two colors and cut 2" vertical lines in the felt.  I spaced them about 1" apart.  Only do 3-5 cuts at a time though.  I flipped the felt through the cuts to get the twist, and it doesn't matter which way it's flipped as along as you do it the same way the whole length of the garland.  Or don't if that's the look you want.

One finished garland.

I made a bunch in red/white, green/white, and red/green. The best part about this is you could pick any colors you wanted to make it work for different holidays.  I'll probably pull out the red/white felt for valentines day and the green/white could be used for saint patrick's day...if that's something you decorate the house for.  Who knows maybe I'll make more after christmas that's just everyday fun colors like pink and purple for the craft room.

To make longer garland, I used a zigzag stitch to sew the edges together.  I used little command hooks to hang these all over the apartment; I love command hooks.  I bought 3 or 4 packages to hang lights and garland and have used them all over.

Our bedroom door.

Laundry room door.  After Steve got home, I had to readjust the height of the hanging downie bit because Steve didn't want to keep running into it.

In place of the halloween decorations, I put up christmas garland.

And again on the stairway half wall.

Thursday, December 22, 2011

DIY Glitter Ornaments

The glitter ornaments I made for christmas were absolutely my favorite ornaments this year.  I love glitter, but I hate how messy it can be when the glitter is glued on the outside of ornaments or decorations.  Hobby Lobby had a lot of really cute glitter decorations for christmas, but they were all molting glitter all over the place, so no thank you.  The last thing I need to be vacuuming christmas glitter in July.

So, I found a great tutorial from Greenbean's Crafterole on pinterest (of course) that has the glitter on the inside of the ornaments.

I started by making just one to see how well it would turn out and so that I wouldn't ruin a whole package of clear ornaments if it turned out icky.

The hardest part of the entire process was finding Pledge Floor Care with Future Shine.  I knew it was most likely to be at walmart (that's where greenbean found hers) but we don't have one near us.  I searched high and low at all sorts of stores trying to find some, but ended up resorting to calling my mom and having her get it from their walmart.  Crazy.


All I had to do was squirt a bit of the floor wax into the ornaments and swirl them around to get the whole surface wetted and then I used a paper funnel to pour in some glitter.  I used a multi pack of glitter from joanns and made on in each color.

The are so beautiful, shiny, and glittery.  I just love them.

I have half a mind to make a hundred or so more, because really what am I going to do with the rest of the bottle of floor wax? I don't have any floors that need waxed and you can't even tell that I used any of it!

Tuesday, December 20, 2011

Royal Icing Christmas Cookies

I have long been a fan of Sweetopia's beautiful iced cookies, and I recently decided to give them a try in the form of Christmas cookies since I got a huge tub of wilton christmas cookie cutters on Black Friday.

Making cookies with royal icing was a bit of a time consuming process, and overall ended up spanning three days.  None of the individual steps were too hard, but there were a lot of steps to do/prepare, so I used a lot of the tips and advice on Sweetopia's website.  These are the ones I thought were most useful.


I started by picking out the cookie cutters I would need, and decided what colors I wanted to use to decorate them.  I ended up making eight colors of icing, and in the future I'd probably try and limit it to 4 or 5 because of lack of equipment.

Traditional Christmas colors

All the other colors.  The pink is supposed to be burgandy, and I would have liked a slightly darker brown.

I used wilton gel colors.  You can't use regular food coloring because the liquid changes the consistency of the icing.

Before I made my cookies, I made a batch of icing.  It was pretty challenging to get the right consistency, and I'm convinced it could have been better, because my white and yellow were a bit runny while red and green were a bit too thick.  It was recommended to make and color the icing a day in advance because the colors darken with time, but I didn't see much change.  I probably will skip the waiting there in the future.

I decided that I wanted a soft, fluffy cookie instead of a denser standard sugar cookie, so I used a soft sugar cookie recipe from Annie's Eats.  Some of my cookies spread a bit too much, and I found out afterword that leaving out the baking powder helps prevent spreading, so I'll definitely try that next time.  I also wasn't very consistent with the thickness of my cookies so some of them got a bit to crisp in the oven.


Practiced some piping on parchment paper first to get the hang of it.

The first round of icing just filled in the cookie.

My white icing was a bit too runny so some of my snowflakes and snowmen had drips falling down the sides.

I used two colors of icing here and a toothpick to make a really cool marbling effect, and these were some of my favorite cookies.

After the cookies dried, I added all of the details to the gingerbread men, candy canes, and snowmen.

I didn't give my little snowmen any noses because I didn't want to make up orange icing for such a small detail.


After I got done icing all my cookies, I still had plenty of icing left, so I decided to make an icing floodout, which is icing piped straight onto parchment paper instead of a cookie.  I copied the general shape of the snowman from sweetopia's floodout tutorial.  I thought he turned out really cute, but he was very fragile and broke into four pieces after it dried completely.


So that was my christmas cookie experiment, and I definitely think I'm going to make more cookies!
Thursday, December 15, 2011

DIY Wall Art

Here's another (mostly) finished project, this time I turned the blank wall in our bedroom into a mini gallery:


The painted ship is from our trip to Greece, the temple canvas is from Greece too, but it's a photo I had printed on canvas from Canvas on Demand (highly recommended!!).  The two smaller photographs are from Pisa and the water treatment plant in Saudi Arabia, and the four hand water colored paintings were made for me by Allie after Algebra ruined the first set.  The empty frame is supposed to have a print in it, but I need to find someone to print it for me.  I would love to get it printed on rag paper, but I'm not sure that's feasible.

The three white frames are from my grandmother and are actually supposed to be spray painted black,  but I lost my steam on those in the fall after I had primed them.  By the time I was ready to get them finished it was way to cold outside to spray paint, so they'll have to get finished in the spring.  The wooden frame was also supposed to get primed and spray painted, but it ended up back in the stack of reject frames and got forgotten about instead.  The three black frames I bought from Target after I decided to get this project (mostly) finished.

I really thought I wanted all of the frames to be painted black, but now I think I'm really enjoying the random assortment of frames and colors up on the wall.

Wednesday, December 14, 2011

DIY Marbled Ornaments

Along with our newly acquired store bought ornaments for the tree, I wanted to try making some as well so I got a few packages of clear, glass ornaments to decorate.

I found a few pictures of other painted ornaments to give me some inspiration and then just gave it a go to see what I could create.

These beautiful hand painted ornaments represented the general look I was going for.


I loved the solid colors of these ornaments, and used some of the same colors in mine.

I used regular acrylic paint and squeezed small amounts of the paint into the ornaments and let them swirl around to mix and cover the whole ornament.

In the blue/white ornament I alternated blue and white stripes and then rotated the ball to cover inside completely.  With the blue/pink and pink/white I added all of one color and swirled it around before adding the second color to the bulb.

My only disappointment with these is that as they dried and the excess paint pooled in the bottom they lost a lot of the really fine marbling details.  I should have turned them upside down over paper cups immediately after finishing them to let the paint drip out not into the bottom.

These are the only three I made, since I didn't want to buy too many different bottles of paint, but I can definitely see myself making more of these in the future!

Tuesday, December 13, 2011

DIY Ornament Display

As a child my family had a wonderful tradition of exchanging handmade christmas ornaments between all of our cousins.  I remember as a kid pouring over craft magazines trying to figure out the perfect ornament to make.  With the addition of nine ornaments each year, I've accumulated quite a few lovely ornaments and since I got my own tree in high school, I've used these ornaments to decorate.  Now that Steve and I are combining our christmas ornaments and decorations, there isn't room on the tree for all of them.

I didn't want to keep them all in storage so I have them on display in the craft room.  On pinterest, I found this image which gave me the idea to have them on display:
originally from A Diamond in the Stuff


Some of the ornaments don't hang, so they're sitting out on the sideboard table in the craft room.


I used ribbon to create a place to hang them all on the wall.


This is a great way for me to display these, and after christmas is over I look forward to replacing them with photographs to hang from the ribbons as seen in the middle picture below:

from pinterest