Showing posts with label crafts. Show all posts

Monday, July 16, 2012

Hey Look a Craft

Aka my job has been taking over my life! I have spent so much time working lately due to various problems and issues at work that I haven't had much of any time for crafting in the last three months. My life has revolved around working, sleeping and maybe just maybe grabbing some food in between. It's coming to an end however and I can finally work on having a real work/life balance for awhile. Or at least until the next problem rolls around, as it undoubtedly will. But all the work has definitely been worth it, both in overtime pay which has helped us save for a house faster and in experience at my job. I've now worked through some of the most challenging situations we're likely to see, and now I will be much better prepared if heaven help us they happen again in the future. I've also gotten a chance to do some networking with managers from other mills as they have come in to help us from time to time.

Now that I've gotten off track talking about work, it's time to focus on the fun weekend activities instead! Ages ago I saw a cute door decoration on pinterest courtesy of Marsh madness and I knew that it would eventually make a great front door decoration. Our last front door decoration which we put up just before Christmas only lasted until about February until Steve declared that it was clearly a winter wreath and couldn't stay up any longer. We ended up going nearly five months without anything pretty on the front door because I just didn't have time to devote to crafting or even buying anything.

With work settling down, I took a trip last weekend to Joann's to see what kind of fun goodies I could find. I ended up with several cute storage boxes to use in our linen closet, tissue paper for another craft (coming soon!), a cute wooden letter and a roll of decorative packing tape just because I thought it looked pretty. I also found a cheap certificate frame at Home Goods that was just what I wanted for this project. Originally I thought I was going to paint the wooden letter, but then I realized how fun it would look with the packing tape wrapped around it!

The frame and partially taped letter. See how well they go together! I never would have guessed that this combination would be exactly what I wanted. I used a razor blade to cut lines in the packing tape so that it would go around the curves smoothly. There were a few places where i should have cut smaller pieces for a better fit around the curves, but it still looks so pretty. I didn't cover the entire back of the letter because it won't really be seen and the packing tape was $7 a roll!


I used some of my free ribbon from Steve's grandmother from my awesome ribbon rack to wrap around the letter and the frame so that I could hang it. It does clatter a bit when we open and close the door, so I might have to find a better way to secure it if the noise ends up bothering me, but if it doesn't then all the better!

Friday, February 17, 2012

Jersey Knit Headband

To go along with the jersey bracelets I made ages ago, I made a cute 5 strand braided jersey headband to go along with them!

I used the tutorial from make it and love it.  I had to go through the steps to do the 5 strand braiding several times before I got the hang of it, but the pictures in the tutorial make it pretty easy to figure out if, like me, you haven't done it before.

Another tip for anyone who might want to try this out: I found the tucking the top of the braid under my sewing machine helpful because that held it very firmly in place.  I had to tug and poke a bit to get the braid to be even throughout the length, but using my sewing machine as a paper weight meant it didn't pull out at all.


This headband is especially useful now that my hair is so short!

Wednesday, February 15, 2012

Fat Quarter Purse

This is a cute little purse I made using two fat quarters and a few quilting scraps.  It's a bit small for me to use, but I bet a little girl would love carrying around something this size!

The tutorial came from make and takes, and as long as you can do basic sewing skills you can easily make this!  I did make a few changes because I didn't have the ribbon recommended to use for the handles and the contrasting band.  Instead I substituted some fabric scraps left over from my first quilt.  I basically made two tubes of fabric for the handles and then sewed two lines down each handle (before attaching!) to give it a bit of stability.

Since I wandered down my own path a bit with this project, whenever I got stuck I stopped and looked at one of my fabric purses that I love to see how I could emulate it.  So if you get stuck, just look around for a similar project and see if you can use that for inspiration!


I even has a cute little pocket on the inside!


Monday, February 13, 2012

Simple DIY Pajama Pants

Another sewing project reporting for duty!  Going an entire year sans sewing machine has given me a drive to use it whenever I can (although a full time job seems to be getting in the way lately!).  It's so fun to turn a few pieces of fabric into something awesome and useful.

The extent of my experience sewing clothes has been a bit of hemming because my pants are always too long.  Not that I was going to let lack of experience stop me from trying out a tutorial for flannel sleeping pants.  Making clothes is very easily more expensive than buying them, so I had to figure out if it was even going to be worthwhile to make them.  Replacing with pants from Old Navy was about $10, which is hard to beat, but the colors and patterns available were pretty slim.  Making pants ended up being less expensive only because there was a great 60% off sale on flannel at Joanns, which meant that a yard was only $3.  I ended up using 2 3/4 yards for me and 3 yards for Steve.

The tutorial I used from My Cotton Creations was really straight forward and it was very easy to do!


This is the fabric Steve chose. The first step is to line up the pattern (an old pair of pants) and cut out the fabric.

This is how the top band ended up.  Originally I skipped the elastic band and just had the drawstring, but I had to go back and add the elastic because they did not stay up well without it.

 
My new pants finished.  Steve's aren't done yet, or I'd show those too!


Sunday, February 12, 2012

DIY Valentine's Day Felt Garland

You didn't think I'd go past a holiday without doing a little bit of decorating for it did you?  Of course not. Since I didn't have any good ideas in my database, I started by browsing pinterest for some ideas, and found a couple of cute ones!

I wish I knew exactly where these directions came from, but once I hit this chinese website, that was as far as I could trace the source.


Since the picture above was the extent of the directions I had to do some guessing as far as the size of my felt.  I ended up using 4" tall felt and that made really nice shaped hearts, but you could go taller or shorter depending on your heart shape preferences.

This is how I threaded 3-4 on string at a time.  Doing this made the garland assembly move much quicker.

Spread out garland.


I used red, pink, and white felt here, but it's hard to see the difference between the pink and red.

To take the place of my twisted felt garland from christmas, I strung some of the hearts vertically instead of horizontally as above.

And finally hung one last strand over the living room entry way.

I've still got one or two more Valentine's day crafts to show, so stop back soon!

Friday, January 13, 2012

Inspirational Canvas Art

My typical process for finding and doing new projects and crafts usually involves cool ideas staying open in tabs for a week, spending a few more weeks in a bookmarks folder, and then finally just maybe I'll get around to gathering all of the materials if I still want to do it.  My canvas art project followed this path closely and ended up taking forever to finish because I kept running into road blocks.

Not knowing what kind of challenges I would have, I knew as soon as I saw the original post on elise blaha's blog that it was a must do project.  It quickly got delayed though when I decided to wait and borrow art supplies from Allie instead of buying paint, brushes, and a canvas new.  I did end up having to wait until a cabin trip, when we would both be home. (I'm totally giving away how long I've been "working" on this, it's bad)

The next delay was completely due to laziness and forgetfulness because I needed to pick out stick on letters to use.  I wanted pretty letters that were at least an inch tall because the canvas is pretty big.  I originally thought the canvas was going to be too big, but I liked how it looked in the end.

After I got the letters, cut them out, and laid out on the canvas I thought it was going to be a quick and easy finish.  Yeah, right.  Turns out that scrapbooking stickers do not stick to canvas despite being great on paper.

The letters a and n in the lower left corner were my starting point and they curled up and did not adhere to the canvas one bit.

Discouraged, I did a bit of internet searching and found out that contact paper would probably stick to canvas.  I didn't want to cut out the letters by hand so I decided again to wait until I was home so I could mooch off of mama.  She has a sizzix machine and several alphabet sets which I hoped would suit my fancy.

Thus over Christmas vacation, while Allie tried to best my glitter ornaments, I cut letters, peeled them, and painted my canvas.

DIY tip: Tweezers were the best tool for peeling the contact paper and accurate placement on the canvas.  Not wanting to free form the letters meant I had to forgo punctuation because the sizzix sets didn't have any, so I'm choosing to ignore that minor flaw.

I know the paint looks blue here, but really it's much more purple like in the picture below.

 I let the paint dry for a few hours before peeling off the letters with the tweezers.

The "y" had some paint bleeding, but very minor!

Paint bleeding under the contact paper was a concern and it did happen a bit, but I think it adds a hand crafted look to the project.  The bleeding was minor and from a distance you can hardly see it.

Wednesday, January 11, 2012

Ribbon Storage Rack

Here's yet another project that has been finished since before the holidays, but I've not found the time to share it.

I got a box of great ribbon (expensive too!) from Steve's grandmother when we moved in back in August and rather than leave it in the box where I would no doubt forget about it, I wanted Steve to make me a rack to store it on.

I based mine on a set of photos I found on flikr via pinterest (and yes I want to copy them all, so fabulous) and made the dimensions so it would fit in the space next to the window in the craft room.


Steve couldn't make the cuts to have the dowels pull straight out the front like the original, so he drilled holes in the sides and I pull them out to the right.

One side has these cute wooden toy wheels stuck on and the other side has a groove cut into the dowel so I can slip metal clips into the groove.


These clips keep the dowels from sliding out of their own volition and are easy enough to pull off when I need to take off a spool of ribbon.

This was great to have around at Christmas; it made it so  much easier to incorporate ribbons into my wrapping.


I may prime and paint it at some point in the future, but for now, I'm pleased as punch!

Saturday, December 24, 2011

Model Magic Ornaments

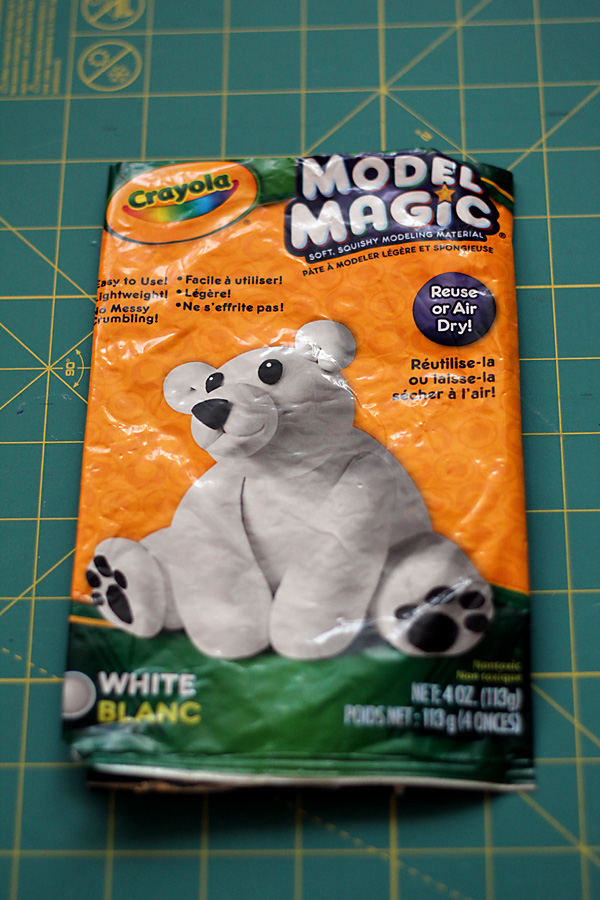
Another fun ornament craft I found was making model magic ornaments.  I haven't used model magic much if ever before, but it did end up making fun ornaments.


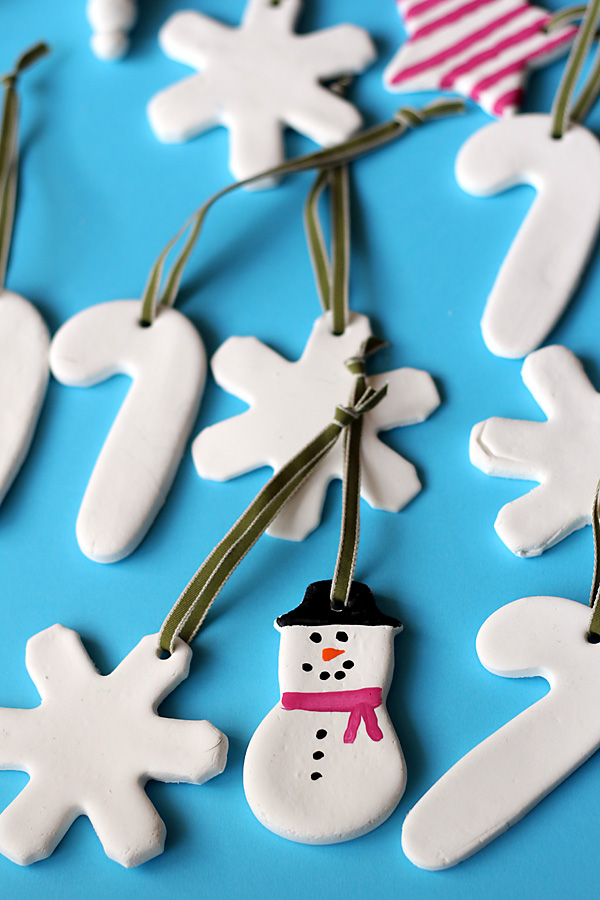
 I got one package of white model magic, but other christmas or holiday colors would be great too.  I rolled it out on my cutting mat and used some christmas cookie cutters to cut out shapes.  To have a place to hang them from, I used the end of a straw to make little holes in the top that I could pass twine or ribbons through.

Requisite cat crafting photo.

The drying time for model magic is a bit long at 24-48 hours, and I had to sit them up high so that curious kitties couldn't leave model magic footprints behind.


After a day I flipped them over to let the other side dry.  The only bad part about this project was when I let the finished ornaments sit on my sideboard for a few days, and then we bought a humidifier.  When I went to pick up the ornaments, they had absorbed enough moisture out of the air to cause them to stick to the table.  It ended up ruining two of the ornaments, and it was a pain in the rear to get off the table.

Since I made a few snowmen, I used some acrylic paint to give them some faces, buttons, and scarves.  I also did a little paint doodle on another ornament just to add some color.  The model magic blends pretty well according to the package directions, so I think it could be neat to do some color blending and have a striped or marble effect dried into the ornaments.


Friday, December 23, 2011

Twisted Felt Garland

The glitter ornaments were hands down my favorite christmas addition this year, and these twisted felt garlands were easily my second favorite, in part because they were so darn easy and quick.

I found the twisted felt tutorial on the Purl Bee and I knew it would be a great project.  There are also way more detailed directions over there, so check it out if you're interested in making these!

Step one is always to let the cat sit on the new project.  Or rather that's what she thinks step one is.  I got 1/2 of a yard of felt in red, green, and white and was able to make a ton of garland.  If you don't want quite so much, I'd recommend 1/8 or 1/4 of a yard.  I also got the really wide felt that's 72".


I folded the felt and squared off the edge, and then refolded it so that it was about a foot tall and cut off one inch strips.  For me that meant I was cutting through eight layers of felt with the rotary cutter.  My edges weren't totally straight or a consistent width, but I was going for quick and easy.  You could easily do this with just a pair of scissors though the rotary cutter made cutting much quicker.

After I had my strips cut out, I lined up two colors and cut 2" vertical lines in the felt.  I spaced them about 1" apart.  Only do 3-5 cuts at a time though.  I flipped the felt through the cuts to get the twist, and it doesn't matter which way it's flipped as along as you do it the same way the whole length of the garland.  Or don't if that's the look you want.

One finished garland.

I made a bunch in red/white, green/white, and red/green. The best part about this is you could pick any colors you wanted to make it work for different holidays.  I'll probably pull out the red/white felt for valentines day and the green/white could be used for saint patrick's day...if that's something you decorate the house for.  Who knows maybe I'll make more after christmas that's just everyday fun colors like pink and purple for the craft room.

To make longer garland, I used a zigzag stitch to sew the edges together.  I used little command hooks to hang these all over the apartment; I love command hooks.  I bought 3 or 4 packages to hang lights and garland and have used them all over.

Our bedroom door.

Laundry room door.  After Steve got home, I had to readjust the height of the hanging downie bit because Steve didn't want to keep running into it.

In place of the halloween decorations, I put up christmas garland.

And again on the stairway half wall.

Thursday, December 22, 2011

DIY Glitter Ornaments

The glitter ornaments I made for christmas were absolutely my favorite ornaments this year.  I love glitter, but I hate how messy it can be when the glitter is glued on the outside of ornaments or decorations.  Hobby Lobby had a lot of really cute glitter decorations for christmas, but they were all molting glitter all over the place, so no thank you.  The last thing I need to be vacuuming christmas glitter in July.

So, I found a great tutorial from Greenbean's Crafterole on pinterest (of course) that has the glitter on the inside of the ornaments.

I started by making just one to see how well it would turn out and so that I wouldn't ruin a whole package of clear ornaments if it turned out icky.

The hardest part of the entire process was finding Pledge Floor Care with Future Shine.  I knew it was most likely to be at walmart (that's where greenbean found hers) but we don't have one near us.  I searched high and low at all sorts of stores trying to find some, but ended up resorting to calling my mom and having her get it from their walmart.  Crazy.


All I had to do was squirt a bit of the floor wax into the ornaments and swirl them around to get the whole surface wetted and then I used a paper funnel to pour in some glitter.  I used a multi pack of glitter from joanns and made on in each color.

The are so beautiful, shiny, and glittery.  I just love them.

I have half a mind to make a hundred or so more, because really what am I going to do with the rest of the bottle of floor wax? I don't have any floors that need waxed and you can't even tell that I used any of it!

Tuesday, December 20, 2011

Royal Icing Christmas Cookies

I have long been a fan of Sweetopia's beautiful iced cookies, and I recently decided to give them a try in the form of Christmas cookies since I got a huge tub of wilton christmas cookie cutters on Black Friday.

Making cookies with royal icing was a bit of a time consuming process, and overall ended up spanning three days.  None of the individual steps were too hard, but there were a lot of steps to do/prepare, so I used a lot of the tips and advice on Sweetopia's website.  These are the ones I thought were most useful.


I started by picking out the cookie cutters I would need, and decided what colors I wanted to use to decorate them.  I ended up making eight colors of icing, and in the future I'd probably try and limit it to 4 or 5 because of lack of equipment.

Traditional Christmas colors

All the other colors.  The pink is supposed to be burgandy, and I would have liked a slightly darker brown.

I used wilton gel colors.  You can't use regular food coloring because the liquid changes the consistency of the icing.

Before I made my cookies, I made a batch of icing.  It was pretty challenging to get the right consistency, and I'm convinced it could have been better, because my white and yellow were a bit runny while red and green were a bit too thick.  It was recommended to make and color the icing a day in advance because the colors darken with time, but I didn't see much change.  I probably will skip the waiting there in the future.

I decided that I wanted a soft, fluffy cookie instead of a denser standard sugar cookie, so I used a soft sugar cookie recipe from Annie's Eats.  Some of my cookies spread a bit too much, and I found out afterword that leaving out the baking powder helps prevent spreading, so I'll definitely try that next time.  I also wasn't very consistent with the thickness of my cookies so some of them got a bit to crisp in the oven.


Practiced some piping on parchment paper first to get the hang of it.

The first round of icing just filled in the cookie.

My white icing was a bit too runny so some of my snowflakes and snowmen had drips falling down the sides.

I used two colors of icing here and a toothpick to make a really cool marbling effect, and these were some of my favorite cookies.

After the cookies dried, I added all of the details to the gingerbread men, candy canes, and snowmen.

I didn't give my little snowmen any noses because I didn't want to make up orange icing for such a small detail.


After I got done icing all my cookies, I still had plenty of icing left, so I decided to make an icing floodout, which is icing piped straight onto parchment paper instead of a cookie.  I copied the general shape of the snowman from sweetopia's floodout tutorial.  I thought he turned out really cute, but he was very fragile and broke into four pieces after it dried completely.


So that was my christmas cookie experiment, and I definitely think I'm going to make more cookies!